Python kernel
You may hear me use the term "kernel" or "Python kernel" frequently throughout the course. It can be thought of as a mini computer running in the background of your computer. By running Python code in a Jupyter notebook, you are giving instructions to the kernel, the kernel does some processing, then it will give you any outputs you requested.
Stopping and starting the kernel is very similar to restarting your own computer. You get a fresh kernel each time, and this is a good first step for troubleshooting any issues.
When you open up our Jupyter notebooks in Google colab, you will be met with this screen.
You can restart the kernel from the Runtime menu at the top left with two options:
- Restart session: This is essentially turning the kernel on and back on again. However, this does not automatically run all of your Python code.
- Restart session and run all: This restarts the kernel, but then also runs all of your Python cells from top to bottom. Usually you want to use this one.
Persistence
One crucial aspect of Jupyter notebooks to be aware of is that the kernel is persistent. This means that it keeps track of everything you ran while connected to Google's servers. Variables, functions, and computations performed in one Python cell are available in other Python cells—before or after. For example, suppose I have the following three cells:
1:
2:
3:
If I ran cell 1 and then tried to run cell 2, Python would give me an error because course is not defined.
However, if I then ran cell 3, then ran cell 2 again it would work!
This is because the whole Python kernel shares memory; changing anything would update the shared memory and would affect Python cells that run after.
Inspecting
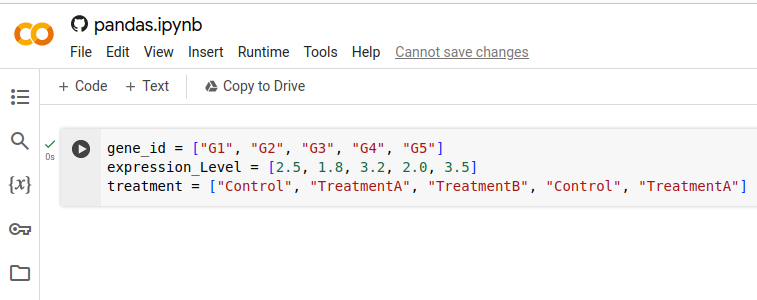
Because all cells share the same kernel, we can actually view (i.e., inspect) what variables we have and what they are defined as. Suppose I define three lists like so.
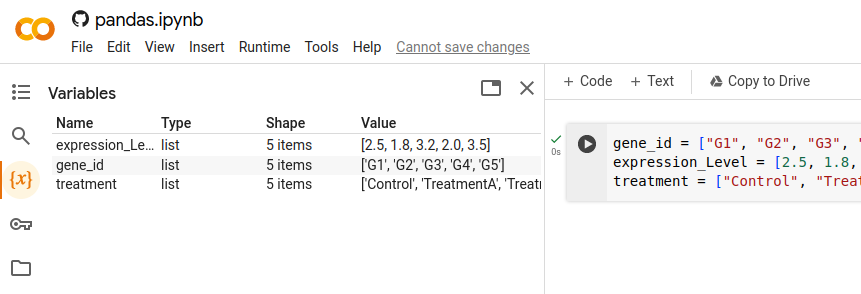
If I click on the \(\{x\}\) symbol on the left, Jupyter will show me all of the variable names, types, values, and other information.


